(function() {
document.addEventListener('DOMContentLoaded', function() {
var componentMetadata = JSON.parse('\x7b\x22componentName\x22\x3a\x22ChannelLinks_a10c1938-4321-41d4-9bf0-aa7515c085e6\x22,\x22deferOptions\x22\x3a\x7b\x22deferComponent\x22\x3afalse,\x22deferType\x22\x3a\x22None\x22,\x22deferId\x22\x3a\x22r0da66732019043ba8bdf89b9135444b8\x22,\x22deferredContainerId\x22\x3a\x22\x2fchannelLinks\x22,\x22deferredContainerView\x22\x3anull\x7d,\x22viewName\x22\x3a\x22ChannelLinks\x22\x7d');
var configuration = {};
var moduleName = 'channelLinks';
var isVueModule = true;
GeneralMills.PandoSites.RegisterControlInstance(moduleName, configuration, componentMetadata, isVueModule)
});
})();
(function() {
document.addEventListener('DOMContentLoaded', function() {
var componentMetadata = JSON.parse('\x7b\x22componentName\x22\x3a\x22ActionToolbar_bcfe5168-4c6e-4b8a-8181-233a0a250020\x22,\x22deferOptions\x22\x3a\x7b\x22deferComponent\x22\x3atrue,\x22deferType\x22\x3a\x22OnDemand\x22,\x22deferId\x22\x3a\x22rdb29c13311494620a1563f7f586288c3\x22,\x22deferredContainerId\x22\x3a\x22\x2ffloatingActionToolbar\x2ffloatingActionToolbar_interop\x22,\x22deferredContainerView\x22\x3a\x22InteropDeferWrapper\x22\x7d,\x22viewName\x22\x3a\x22ActionToolbar\x22\x7d');
var configuration = {"contentId":"7e3b30a5-8207-4b94-9fbe-9d84404d36a4","toolbarSettings":{"id":"bcfe5168-4c6e-4b8a-8181-233a0a250020","regAction":"FAVORITE","eSourceCode":14171,"namePassedToEvents":"ArticleStandardLongFormToolbar","buttons":[{"providerName":"pinterest","providerNamePassedToEvents":"Pinterest","shareUrlFormat":"//pinterest.com/pin/create/link/?url={0}","id":"63cf42f0-8fed-4b1c-acbe-0fe44811231d","allowedForAnonymousUsers":true,"type":"Social","displayName":"Pinterest","namePassedToEvents":"Pinterest","cssClassName":"atButtonPinterest","privacyOptOutMessage":"\u003cdiv class=\u0027privacyMessage\u0027\u003e\n\u003ch3\u003eThis feature is not available with your current cookie settings.\u003c/h3\u003e\n\u003cp\u003eYou can \u003ca href=\u0027#\u0027 data-show-preference-center=\u00271\u0027\u003eupdate your privacy settings\u003c/a\u003e to enable this content. Please enable “Functional Cookies” to use this feature.\u003c/p\u003e\n\u003c/div\u003e","showPrivacyOptOutMessage":false},{"addFavoriteErrorMessage":"Sorry, something went wrong. Please save again.","removeFavoriteErrorMessage":"Error occurred while removing from favorites","regAction":"FAVORITE","eSourceCode":14171,"isCurrentUserAnonymous":false,"isFavoriteItem":false,"id":"351369d5-f1b1-4a90-b495-16074575bb8a","allowedForAnonymousUsers":false,"type":"Favorite","displayName":"Save","namePassedToEvents":"Favorite","cssClassName":"atButtonFavorite","privacyOptOutMessage":"\u003cdiv class=\u0027privacyMessage\u0027\u003e\n\u003ch3\u003eThis feature is not available with your current cookie settings.\u003c/h3\u003e\n\u003cp\u003eYou can \u003ca href=\u0027#\u0027 data-show-preference-center=\u00271\u0027\u003eupdate your privacy settings\u003c/a\u003e to enable this content. Please enable “Functional Cookies” to use this feature.\u003c/p\u003e\n\u003c/div\u003e","showPrivacyOptOutMessage":false},{"providerName":"facebook","providerNamePassedToEvents":"Facebook","shareUrlFormat":"//facebook.com/sharer/sharer.php?u={0}","id":"6d176960-1afd-4a34-83b5-795429359551","allowedForAnonymousUsers":true,"type":"Social","displayName":"Facebook","namePassedToEvents":"Facebook","cssClassName":"atButtonFacebook","privacyOptOutMessage":"\u003cdiv class=\u0027privacyMessage\u0027\u003e\n\u003ch3\u003eThis feature is not available with your current cookie settings.\u003c/h3\u003e\n\u003cp\u003eYou can \u003ca href=\u0027#\u0027 data-show-preference-center=\u00271\u0027\u003eupdate your privacy settings\u003c/a\u003e to enable this content. Please enable “Functional Cookies” to use this feature.\u003c/p\u003e\n\u003c/div\u003e","showPrivacyOptOutMessage":false},{"templateId":"eb460499-2547-4f84-a197-60f31934a3b9","dialogHeading":"Email Article","emailCode":"PB_ContentEmail","dialogSettings":{"cancelButtonText":"Cancel","copyToSenderLabel":"Send a copy to myself","emailAddressesLabel":"* Email Address","emailInstructionText":"Separate email addresses with commas","fromText":"From:","privacyPolicyText":"\u003cp\u003e\u0026copy;2024 General Mills, Inc. All Rights Reserved. This information will only be used to send an email to your friend(s) and will not be saved. Please read our \u003ca rel=\u0022noopener noreferrer\u0022 rel=\u0022noopener noreferrer\u0022 href=\u0022http://www.generalmills.com/company/privacy-policies/privacy-policy-us\u0022 target=\u0022_blank\u0022 shape=\u0022rect\u0022\u003ePrivacy Policy\u003c/a\u003e.\u003c/p\u003e","requiredFieldText":"* Required","sendButtonText":"Send","senderEmailAddressLabel":"* Your Email Address","senderFirstNameLabel":"* Your First Name","sendToText":"Send To:"},"id":"2a5b12c8-299b-467d-812e-41e9a0afb70d","allowedForAnonymousUsers":true,"type":"Email","displayName":"Email","namePassedToEvents":"Email","cssClassName":"atButtonEmail","privacyOptOutMessage":"\u003cdiv class=\u0027privacyMessage\u0027\u003e\n\u003ch3\u003eThis feature is not available with your current cookie settings.\u003c/h3\u003e\n\u003cp\u003eYou can \u003ca href=\u0027#\u0027 data-show-preference-center=\u00271\u0027\u003eupdate your privacy settings\u003c/a\u003e to enable this content. Please enable “Functional Cookies” to use this feature.\u003c/p\u003e\n\u003c/div\u003e","showPrivacyOptOutMessage":false},{"layoutParameter":"p%3d1","id":"783fefb5-010a-4be1-b84d-f0447da7c52c","allowedForAnonymousUsers":true,"type":"Print","displayName":"Print","namePassedToEvents":"Print","cssClassName":"atButtonPrint","privacyOptOutMessage":"\u003cdiv class=\u0027privacyMessage\u0027\u003e\n\u003ch3\u003eThis feature is not available with your current cookie settings.\u003c/h3\u003e\n\u003cp\u003eYou can \u003ca href=\u0027#\u0027 data-show-preference-center=\u00271\u0027\u003eupdate your privacy settings\u003c/a\u003e to enable this content. Please enable “Functional Cookies” to use this feature.\u003c/p\u003e\n\u003c/div\u003e","showPrivacyOptOutMessage":false}],"isSticky":true},"userSettings":{"isCurrentUserAnonymous":true,"isFavoriteItem":false},"pageAttributes":{"url":"https%3a%2f%2fwww.pillsbury.com%2feveryday-eats%2fleftover-guide","contentId":"7e3b30a5-8207-4b94-9fbe-9d84404d36a4"},"recaptchaPublicKey":"6LceAigUAAAAAC8aIQvJ9yRpRl3r1ZBKbou-tIDe"};
var moduleName = 'actionToolbar';
var isVueModule = true;
GeneralMills.PandoSites.RegisterControlInstance(moduleName, configuration, componentMetadata, isVueModule)
});
})();
All products featured on Pillsbury.com are independently selected by our editors. However, when you buy something through our retail links, we may earn an affiliate commission.
If your family’s food waste is getting you down, you’re not alone—40% of all food in the United States* is wasted, and more than half of that happens in home kitchens.
Some of that waste is food that we simply don’t cook, but a lot of it comes from either cooking too much and tossing the leftovers—or saving them and then forgetting to eat them. And, boy, can we relate: sometimes even the best leftovers get lost in the back of the fridge!
How to Plan Your Meals and Your Leftovers
.jpg?sc_lang=en)
One of the best ways to ensure you use up all the food you buy is to make a meal plan for the week. (If you love paper products as much as we do, there are so many cute meal planners out there! Not to mention cool whiteboards.) If you know what you're making, you’ll waste less fresh food—and you can even plan out how you use the leftovers.
Here are some ideas for using leftovers:
-
Pack lunches: Leftovers make great lunches! Package your leftovers up in individual servings so your family can grab them and go in the morning.
- Refrigerate or freeze for future meals: If you make a large batch, you can tuck your leftovers into the fridge or freezer for dinner later that week or even a month later. Your future self will thank you.
- Reinvent them: You can turn leftovers into a whole new dish by mixing them with other ingredients. For example, leftover chicken can become tacos and leftover roasted veggies can become a salad.
- Swap them: Plan to make big batches of your favorites and then swap half with your BFF’s family—two wholly different meals for the price of one—and it’s fun!
How to Store Your Leftovers
.jpg?sc_lang=en)
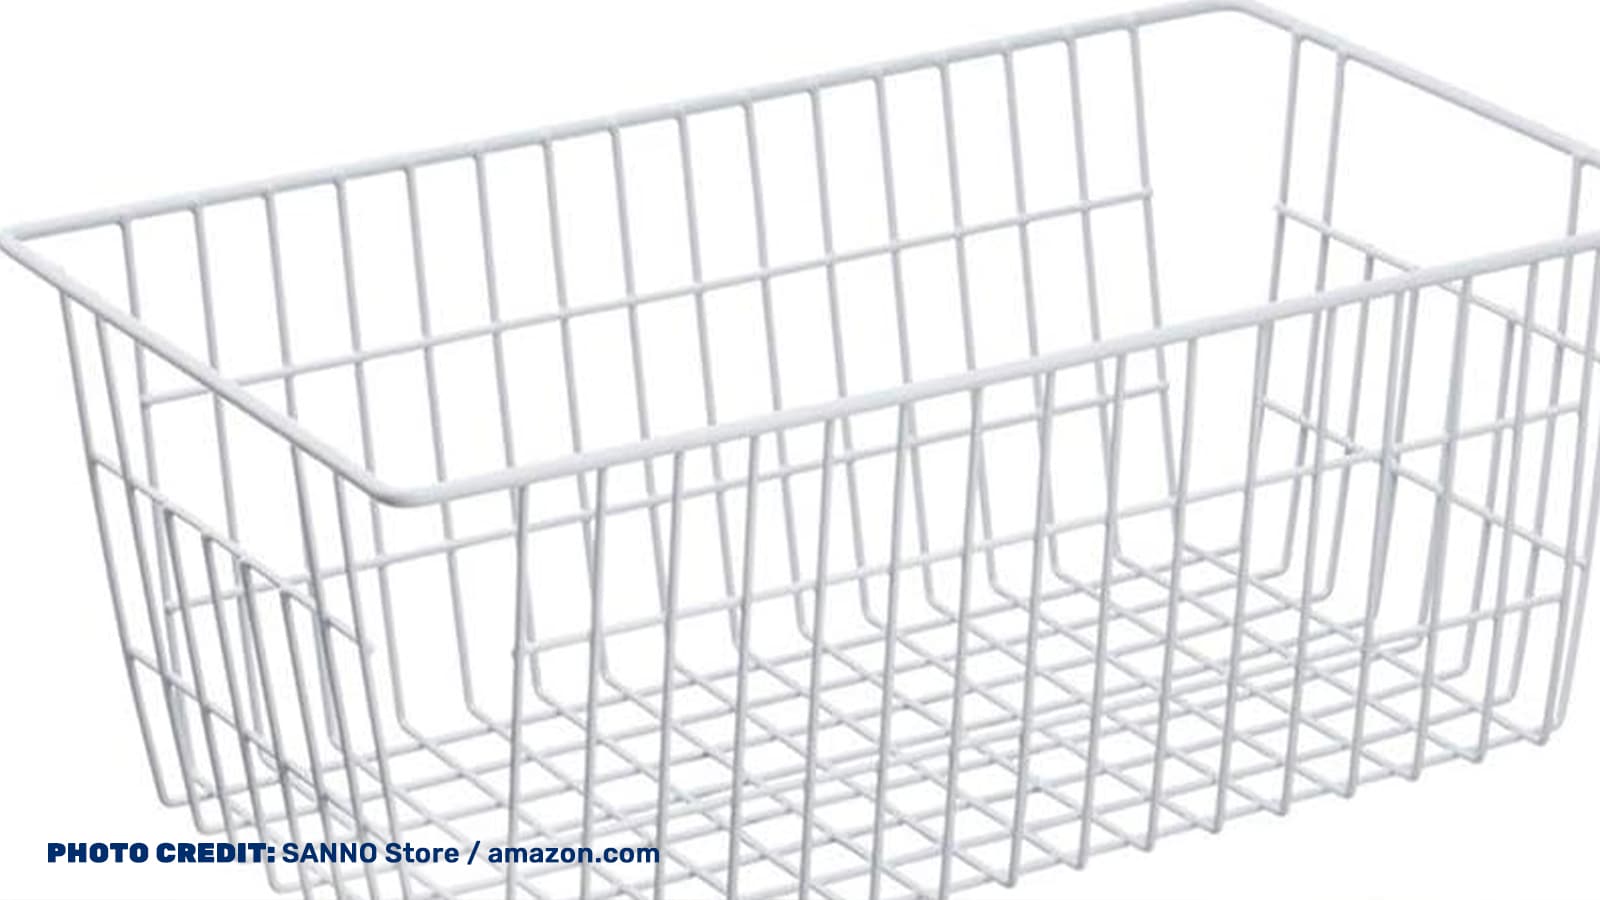
Storing leftovers is one of the bigger challenges for a home cook—starting with finding something to put them in! Our advice is to invest in some containers. For you, that might mean purchasing new ones or it might mean being thoughtful about hanging onto the good ones that come your way. When it comes to finding and using the best storage containers for leftovers, here are some tips:
-
If you can, invest in storage containers: We recommend BPA-free plastic containers that feature lids that snap closed for a tight seal—they are great for freezer and fridge storage, won’t stain (we’re looking at you, pasta sauce) and hold soups and sauces safely so you can take them to work.
- Consider a vacuum sealer for easier storage: You can also vacuum seal leftovers, and it makes them slimmer for easy freezer stacking. This is particularly handy for soups and sauces.
- Save your used containers: Hang onto yogurt and takeout containers as well as canning jars—they’ll be great for storing leftovers. But word to the wise: they may leak, so be careful if you travel with them.
- Don’t store food in cans: Don't refrigerate leftover soup, tuna fish or other foods in cans. Once a can is opened, residual metal on the rim can leach into food and leave a metallic taste.
Remember: If you don’t have a good storage container with a lid, you can always store food in a freezer bag or bowl tightly covered in plastic wrap.
How to Freeze or Refrigerate Your Leftovers
So you’ve got containers full of food, now what? Once leftovers get in the fridge, it’s easy to forget to eat them and lose track of how long they’ve been in there. Here are some tips to help with your leftover management:
-
Refrigerate or freeze leftovers within two hours of cooking: there’s no need to wait for hot foods to cool down before storing them―today’s refrigerators can handle the heat.
- Label and date your leftovers: keep food labels and a sharpie in the kitchen junk drawer and label your leftovers with the dish name and date—that way your family knows what it is, and you know when it went into the fridge or freezer.
- Use the first in, first out rule: organizing your leftovers so that the oldest items are closer to the front of the fridge or freezer will help you prioritize and use leftovers before they expire.
- Use refrigerated leftovers within five days: The USDA recommends using most refrigerated leftovers within about a five-day period.
- Use frozen leftovers within four months: The USDA recommends using most frozen leftovers for up to four months. Many things, like roasts and unbaked fruit pies, can safely store for up to a year. Pro tip: if your freezer is full, try using a freezer organizer to keep things tidy.
- When in doubt, follow your nose: if your food smells funny or looks strange, do not eat it.
Pro tip: If you want specific and detailed information about how long leftovers can last in the refrigerator or freezer, your best resource will be the USDA’s Food Safety website.
How to Reheat Your Leftovers
.jpg?sc_lang=en)
When you’re ready to eat your leftovers, there are so many ways to reheat them. You may be familiar with heating things up on the stove or in the oven, but today’s small appliances are also a quick and easy way to heat up your leftovers. Here are some tips to get you started!
Note: If you’ve had your leftovers in the freezer, you’ll need to safely thaw them, either in the refrigerator, a cold water bath or the microwave oven. (Try to use food within three or four days of thawing or refreeze it.)
-
Microwave: Microwaves were pretty much invented for reheating and are great for a variety of foods, from soups to entrées. You’ll want to arrange the food evenly in a covered microwave safe glass or ceramic dish. Add some liquid if need be, and be sure to vent the lid so the steam can escape. Timing will depend on your leftovers, but you can start with 1 to 2 minutes or use your microwave’s preset buttons.
- Instant Pot®: It’s super easy to steam your leftovers in the Instant Pot, particularly soups, stews, veggies and rice dishes! Place the trivet inside the Instant Pot and add one cup of water. Arrange the food evenly in a heat-proof container, add water or oil if need be and cover the container with aluminum foil. Set the container on the trivet, close up the Instant Pot and steam your food. We generally start with 5 minutes.
- Air fryer: The air fryer is great for reheating foods you want to be warm and a little crispy, like roasted veggies, donuts, French Fries and even burgers. To start, preheat the air fryer for five minutes at 400ºF. Place the leftovers in a single layer in the air fryer and cook at 350ºF for 3 to 5 minutes to start.
- Toaster oven: Like your regular oven, toaster ovens provide gentle, even heating for things like baked goods, grilled sammies and fish. You can reheat food directly on the oven tray. If you’re worried about it drying out, cover it with foil, set your oven to a low temp (no more than 350ºF) and start checking it at ten minutes.
Recipes That Make Great Leftovers
(function() {
document.addEventListener('DOMContentLoaded', function() {
var componentMetadata = JSON.parse('\x7b\x22componentName\x22\x3a\x22ConsumerGeneratedContent_7e3b30a5-8207-4b94-9fbe-9d84404d36a4\x22,\x22deferOptions\x22\x3a\x7b\x22deferComponent\x22\x3atrue,\x22deferType\x22\x3a\x22OnDemand\x22,\x22deferId\x22\x3a\x22r59c0fde04f9242f980ac4b6ab0075a18\x22,\x22deferredContainerId\x22\x3a\x22\x2fratingReview\x2finteropRatingReview\x22,\x22deferredContainerView\x22\x3a\x22InteropDeferWrapper\x22\x7d,\x22viewName\x22\x3a\x22ConsumerGeneratedContent\x22\x7d');
var configuration = {"loaderScript":"https://apps.bazaarvoice.com/deployments/pillsbury-en_us/main_site/production/en_US/bv.js","type":"QuestionAndAnswer","language":"en","includeRatings":false};
var moduleName = 'consumerGeneratedContent';
var isVueModule = true;
GeneralMills.PandoSites.RegisterControlInstance(moduleName, configuration, componentMetadata, isVueModule)
});
})();